Geo area settings
Locations
The locations of the company, the service centers and others can be created and edited in the locations menu. You can  something, you can use the
  -button to edit something, duplicate
  something or delete something by clicking on
  . If you want to refresh you can click on
  . You can switch the selection mode
  . You can use the filter function to select which information or parameters you want to see
  .
.
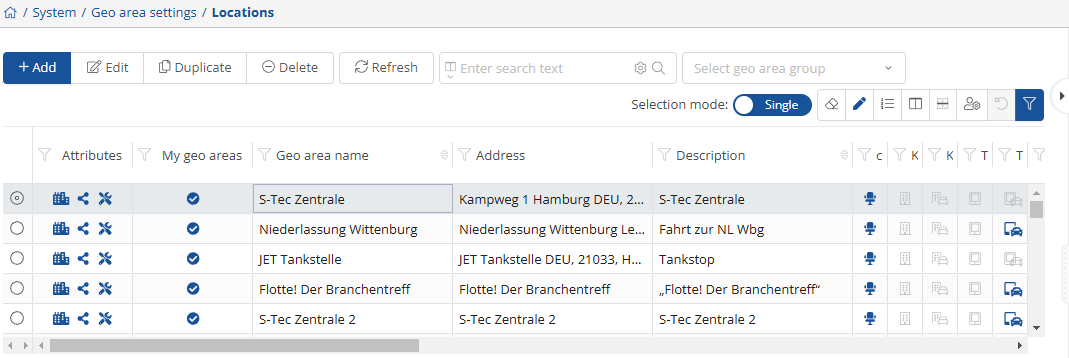
At first glance, you can see all locations with the corresponding addresses in table view.
To add a location, click on the  -button.
The window with the geo-zone properties then opens.
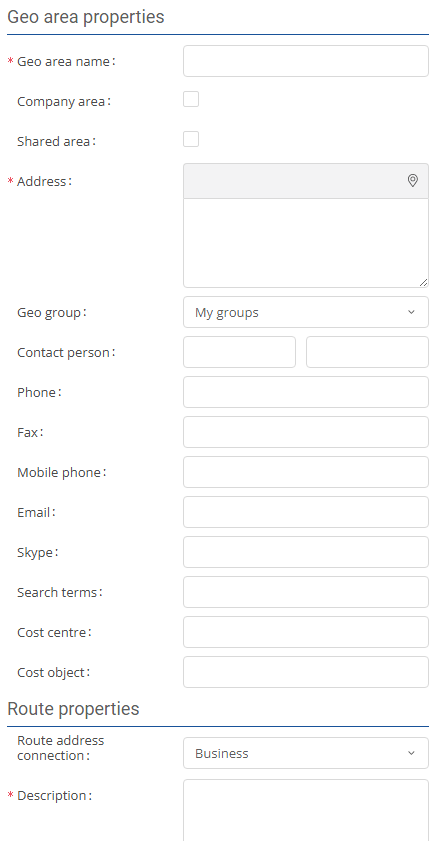
The fields with the red asterisk are mandatory fields.
After you have named the geo-zone, entered the address and added a description, you can select a zone shape from the selection.
Elliptical zone:

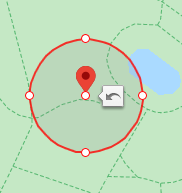
The elliptical geo-zone is a circular zone. The diameter of the ellipse can be drawn larger and smaller at the light markings.
Corner zone:

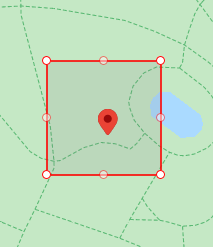
The square zone starts as a square. To create the best possible zone for your area, you can lengthen and shorten the zone at the light markings.
Polygon Zone:

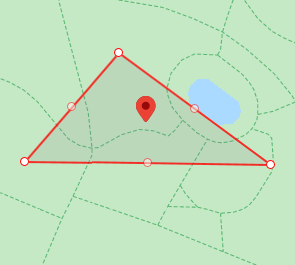
The polygon selection is created by selecting three points on the map. The zone can be changed to any polygon.
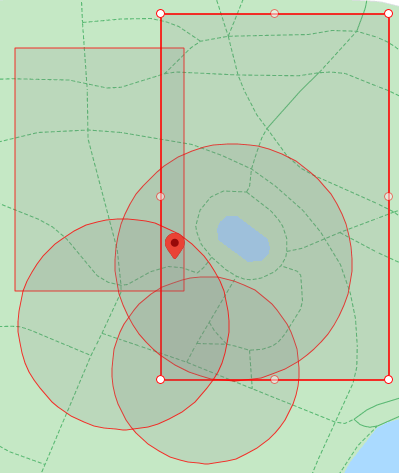
All zones can be combined with each other as desired:
Delete zone:

To delete an individual zone from the map, select it and click on the  -button.
Delete all zones:

To remove all geo-zones from the map, click on the  -button.
.
Once you have successfully entered all the data and the zone on the map meets your requirements, you can save the new geo-zone by clicking on  or
or  . If you do not want to save your zone, select
  .
.
To edit an address subsequently, you must select it and click on the  -button. A window will then open that is similar to the window for creating geo-zones. You can make all the necessary settings there.
If you want to duplicate a geo-zone, select the zone and then click on the  -button.
You can simply remove an existing geo-zone that is no longer required by clicking the  -button.
As soon as a location has been selected, clicking on the  -button to the right of the list of locations displays all important information about the location.
There is always a map showing the location for illustration purposes.
In addition, all important information is displayed and further settings can be made:
Settings:
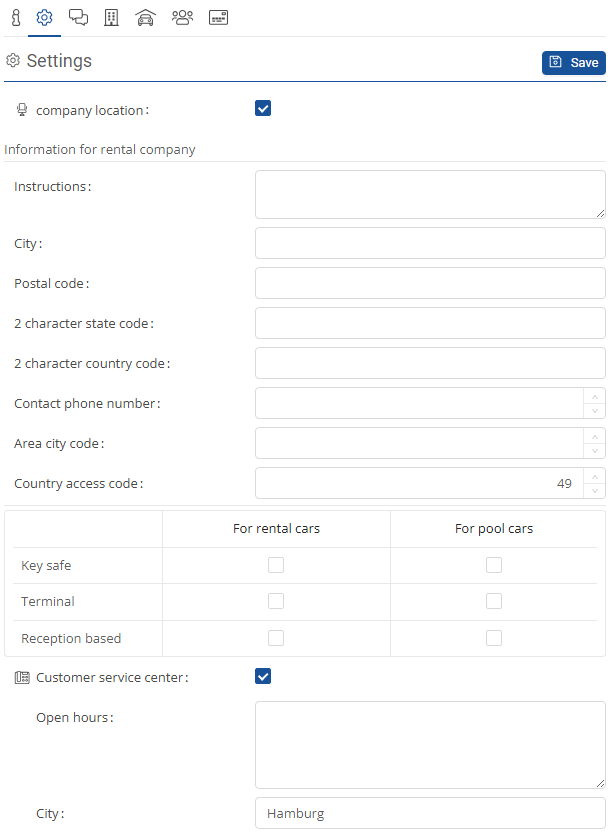
Here you can specify the type of location (company location, service center) and you can enter the opening hours.
Rental company:

In the rental company settings, you can specify which rental companies can deliver and collect vehicles at the location. To add additional rental companies, click on the  -button and select the relevant rental company. You can remove rental companies from a location by selecting the relevant rental company and clicking on the
  -button.
Assigned vehicle:
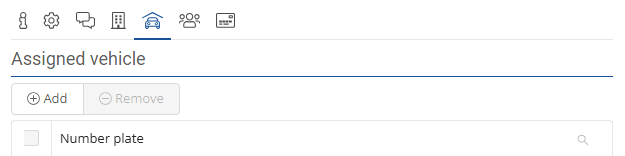
The vehicles assigned to the location are displayed here. To add further vehicles, click on the  -button and select the relevant vehicles. You can remove vehicles from a location by selecting the corresponding vehicle and clicking on the
  -button.
Assigned users:
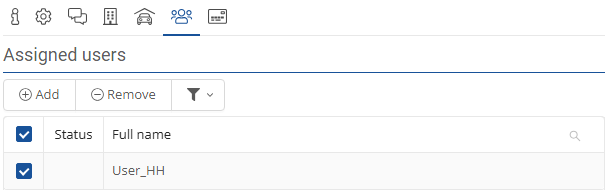
The users assigned to the location are displayed here. To add further users, click on the 0-button and select the relevant users. You can remove users from a location by selecting the relevant user and clicking on the  -button.
Manage geo groups:
You can  something, you can use the
  -button to edit something, or delete something by clicking on
  . If you want to refresh you can click on
  or manage the settings on
  .
.
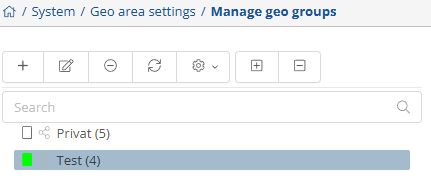
If you can click on -Button , you can add new geo group.
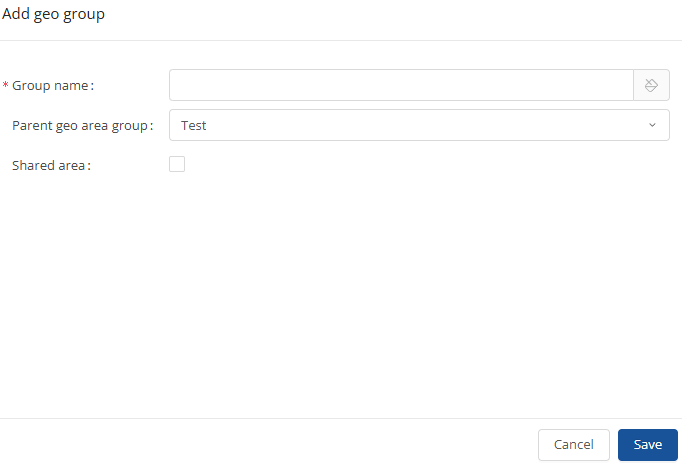
You can save them by clicking on the  -button.
Contact management:
Here you can add new contacts, edit existing ones, and manage everything in this overview.
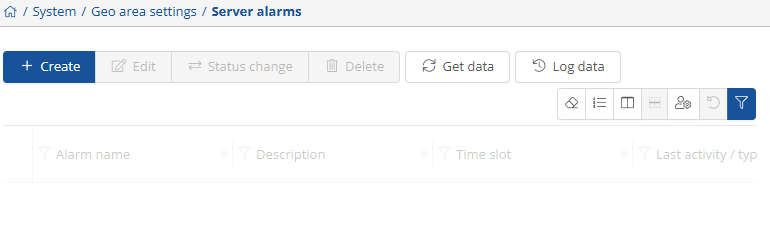
Server alarms:
Alarms can be created, edited, and managed here.