Monitoring
Action log:
In the Action log section, you can see who did what and when, for example, logging in and out in the web view.

You can use the date bar to search for specific time periods. Use the to filter  what you want to see and what is relevant to you.

Rack overview:
The Rack overview section provides you with an overview of your lockers. This allows you to quickly see which compartments are available and which are not.
In the first field, you can filter the racks by location, and the compartments will be listed directly here.
Dashboard:
The “Dashboard” sub-item shows you a complete overview of your lockers. This allows you to quickly see which compartments are available and which are not.
In the first field, you can filter the lockers by location. The corresponding compartments are then listed immediately below.

The individual compartments are listed in the second field. When you move the mouse over a compartment, all relevant information about that compartment is displayed. By clicking on the three lines next to the compartment number, you have several operating options to choose from. A particularly useful function that you will find here is “Open box manually” which can be helpful in the event of a safe malfunction.
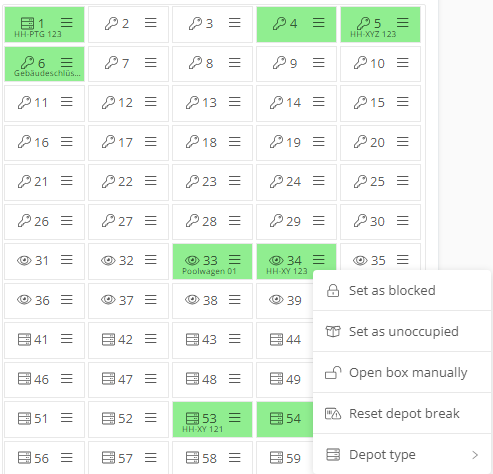
On the safe itself, you also have three lines that you can click on to make certain settings or view information.

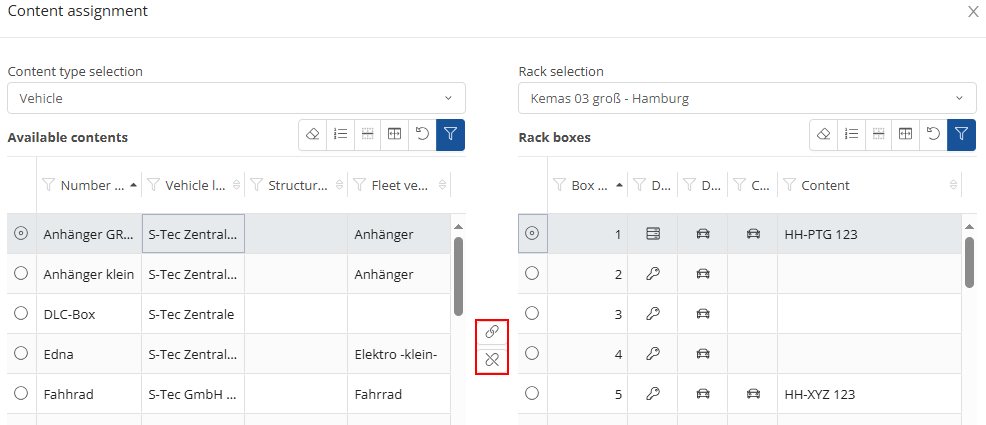
You can access further settings via the buttons. Based on the field, you have the option of directly assigning vehicles to a department using the buttons marked in red.
You can access further settings via the  -buttons. Based on the field
  , you have the option of directly assigning vehicles to a department using the buttons marked in red.