Vehicle settings
Under the Vehicle settings tab, you can make all possible settings for the Corporate and Public Carsharing vehicles.
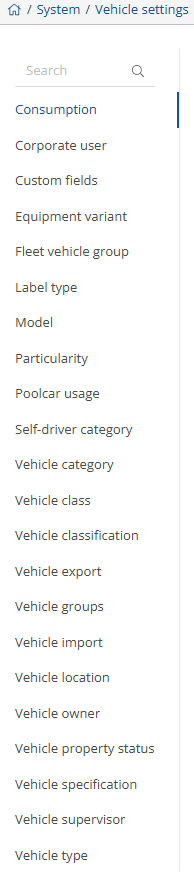

The settings are divided into different tabs.
Consumption:
In the consumption settings, you have the option of creating and editing various consumption groups.
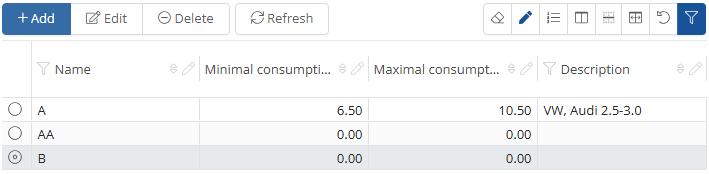
By clicking on the  -button, you have the option of adding a new consumption group.
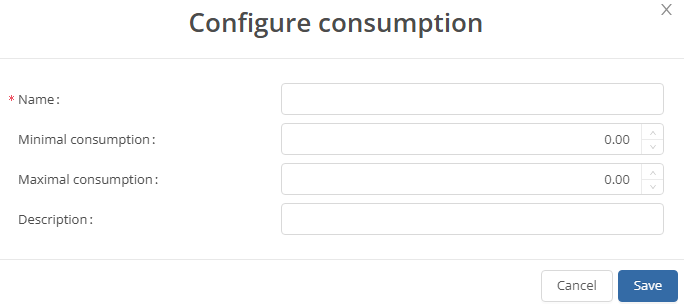
Fields marked with a red asterisk are mandatory fields.
You can save the new consumption group by clicking on the  -button.
You can use the  -button to edit an existing consumption group. A screen similar to the one for adding will open.
Corporate users:
You can add company users and edit existing ones in the company user settings.
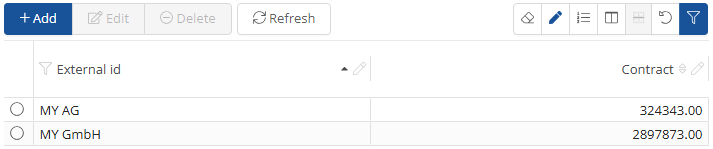
By clicking on the  -button, you have the option of adding a new company user.
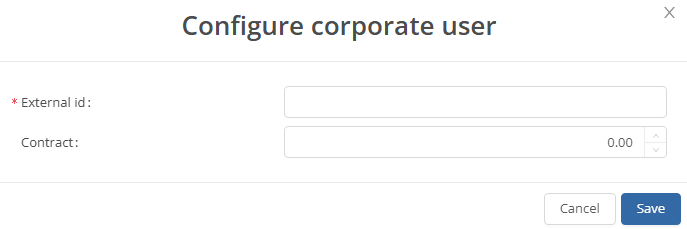
Fields marked with a red asterisk are mandatory fields.
You can save the new company user by clicking on the -button.
You can use the -button to edit an existing company user. A similar screen opens as when adding.
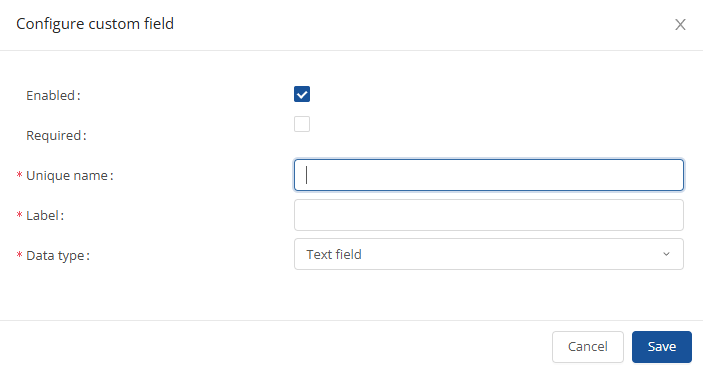
Custom fields:
By clicking on the  -button, you have the option of adding a new , You can use the -button to edit something, or duplicate something by clicking on
  . If you want the chance the status you can click on
  or if you want to refresh you can click on
  . You also have the option of displaying only active custom fields ads or displaying offline ads as well. To do so, click on
  . You can use the filter function to select which information or parameters you want to see
  .
.

When you click on -button, a new window will open and you can add a new one. Click on  to save it.
You can use the -button to edit an existing custom field. A similar screen opens as when adding.
.
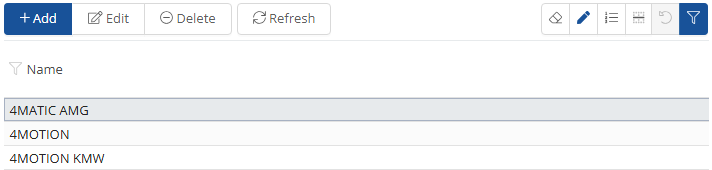
Equipment variant:
You can  equipment variants and rename existing ones in the equipment variant settings. You can use the -button to edit something, or delete something by clicking on
  . if you want to refresh you can click on
  . You can use the filter function to select which information or parameters you want to see .
You can create a new equipment variant by clicking on the -button.
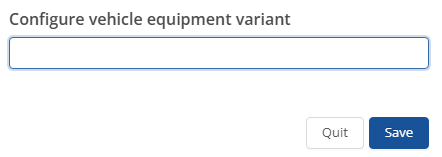
You can save the new equipment variant by clicking on the  -button.
You can use the -button to edit an existing equipment variant. A similar screen opens as when adding.
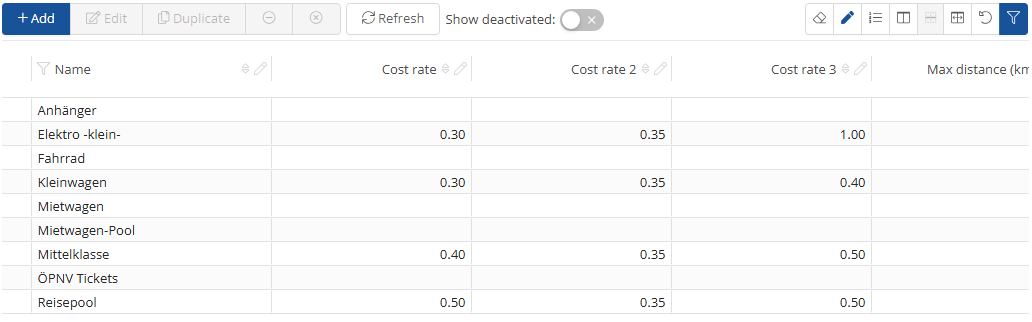
Fleet vehicle group:
In the fleet vehicle group settings, you have the option of creating and editing fleet vehicle groups. By clicking on the -button, you have the option of adding a new , you can use the -button to edit something, or duplicate something by clicking on . Similarly, you can delete something by clicking on  or deactivate something by clicking on
  . If you want to refresh your data you can click on
  . You also have the option of displaying only active fleet vehicle groups ads or displaying offline ads as well. To do so, click on
  .
.
You can create a new fleet vehicle group by clicking on the -button. The following window opens:

In this window, you can set up and name the fleet vehicle group according to your own requirements. The fields marked with an asterisk are mandatory fields.
Once you have configured the new fleet vehicle group, you can save it by clicking on the -button.
You also have the option of editing an existing fleet vehicle group by clicking on the -button. A window similar to the one for adding will then open.
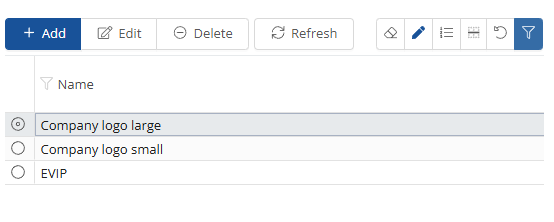
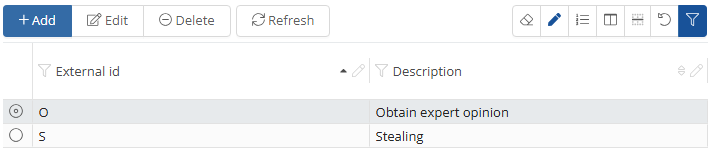
Label type:
You can label types and you can use the -button to edit something, or delete something by clicking on . If you want to refresh you can click on . You can use the filter function to select which information or parameters you want to see .
You can create a new label type by clicking on the -button.
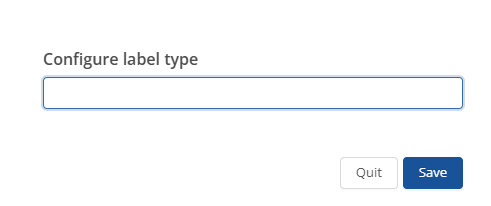
You can save the new one by clicking on the -button.
You can use the -button to edit something . A similar screen opens as when adding.
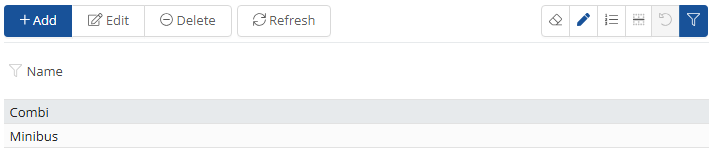
Model:
You can add and edit vehicle manufacturers and associated models in the model settings. You can one and you can use the -button to edit something, or delete something by clicking on . If you want to refresh you can click on . You can use the filter function to select which information or parameters you want to see .
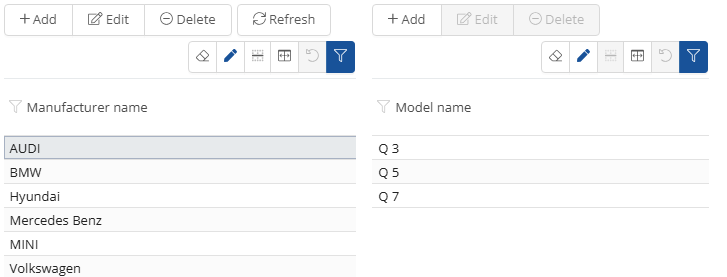
To add a manufacturer, click on the  -button. You can enter the manufacturer in the window that opens.

Click on the -button to save the newly created manufacturer.
You can now select the newly created manufacturer from the list and add models to it. To do this, click on the -button on the right-hand side of the screen.
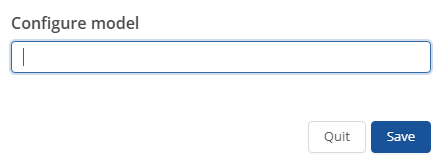
You can now assign a model to the manufacturer and save it by clicking on the -button.
This allows you to add all models of a manufacturer to your system.
Click on the -button to delete the selected manufacturer or model.
Particularity:
In the particularity settings, you can add particularities to the description of vehicles and edit existing ones. You can one and you can use the -button to edit something, or delete something by clicking on . If you want to refresh you can click on . You can use the filter function to select which information or parameters you want to see .
By clicking on the -button, you have the option of adding a new particularity.
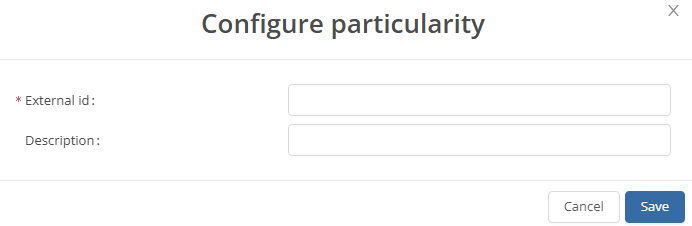
Fields marked with a red asterisk are mandatory fields.
You can save the new particularity by clicking on the  -button.
You can edit an existing particularity using the -button. A screen similar to the one for adding opens.
Poolcar usage:
In the Poolcar usage settings, you have the option of adding and editing supervisors for individual vehicles.
If you have selected one or more vehicles, you will be given the option of selecting a supervisor on the right-hand side of the window.
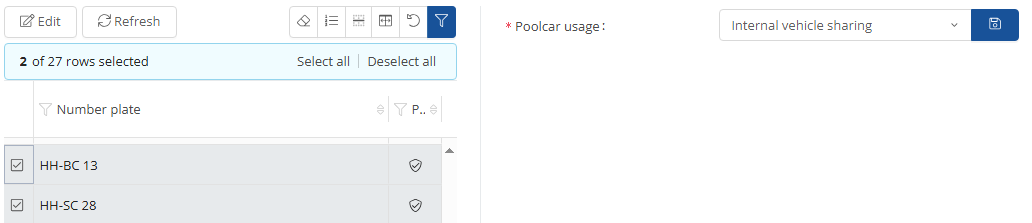
Click on the  - button in the drop-down list to display the available supervisors. Now all you have to do is select the relevant vehicle supervisor and click on the
  -button to save.
In addition, a supervisor can be selected using the  -button.
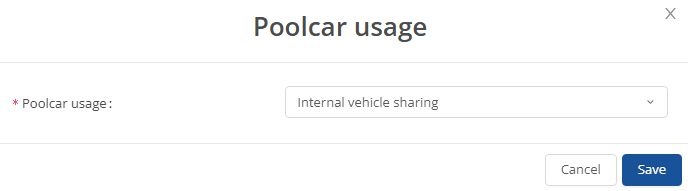
You can save the supervisor by clicking on the -button.
Self-drive category:
In the Self-driving category settings, you can add self-driving categories and rename existing ones. You can one and you can use the -button to edit something, or delete something by clicking on . If you want to refresh you can click on . You can use the filter function to select which information or parameters you want to see .
You can add a new self-driver by clicking on the -button.
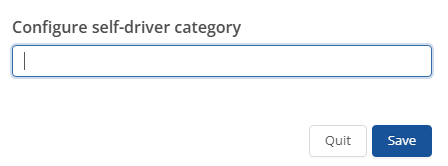
You can save the new self-propelled category by clicking on the -button.
You can use the -button to edit an existing self-propelled category. A similar screen opens as when adding.
Vehicle Category:
By clicking on the -button, you have the option of adding a new ,you can use the -button to edit something, if you want the chance the status you can click on , delete something by clicking on  or if you want to refresh you can click on
  . You also have the option of displaying only active vehicle category or displaying offline ads as well. To do so, click on
  . You can use the filter function to select which information or parameters you want to see .
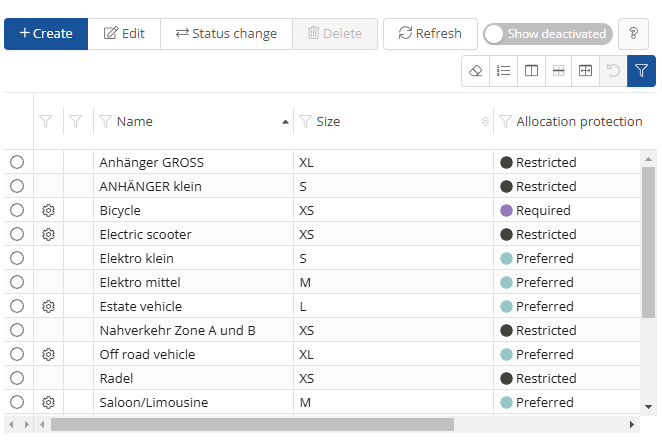
You can add a new one by clicking on the  -button.
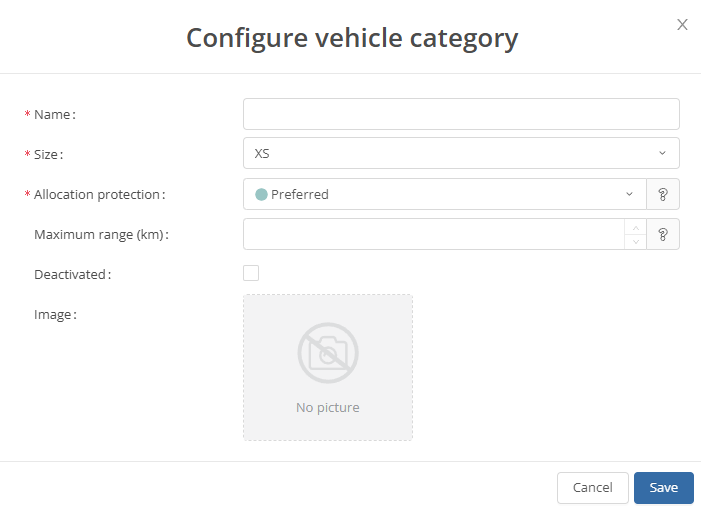
You can save it by clicking on the -button.
You can use the -button to edit an something. A similar screen opens as when adding.
Vehicle class:
You can  one and you can use the -button to edit something, or delete something by clicking on . If you want to refresh you can click on . You can use the filter function to select which information or parameters you want to see
  .
.
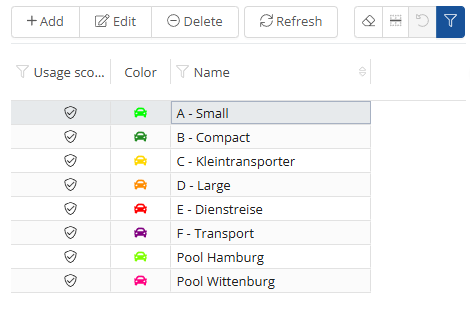
You can add a new one by clicking on the -button.
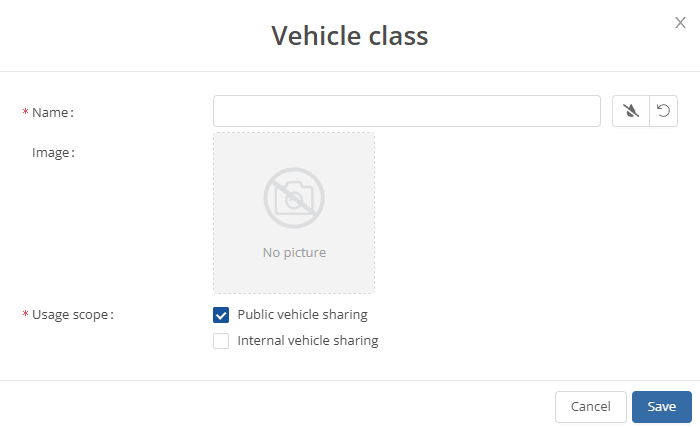
You can save it by clicking on the -button.
You can use the -button to edit an something. A similar screen opens as when adding.
Vehicle classification:
In the vehicle classification settings, you can add vehicle classifications and rename existing ones. You can  one and you can use the -button to edit something, or delete something by clicking on . If you want to refresh you can click on . You can use the filter function to select which information or parameters you want to see
  .
.
You can create a new vehicle classification by clicking on the -button.
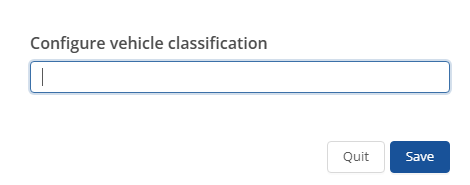
You can save the new vehicle classification by clicking on the -button.
You can use the -button to edit an existing vehicle classification. A similar screen opens as when adding.
Vehicle export:
Here you can filter  which vehicles you want to see. You can then click on the vehicles you want
  and click on
  . Here you can decide whether you want to select all vehicles
  or only those you have already clicked on
  . To refresh click on
  .
.
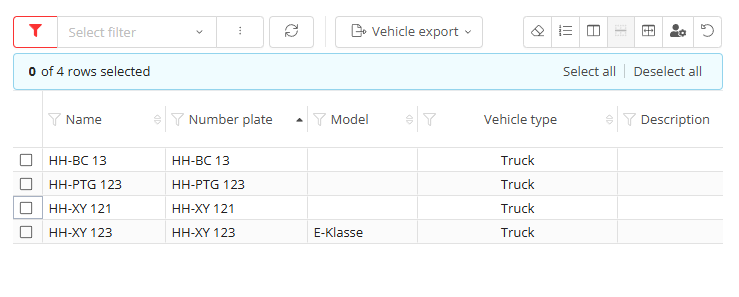
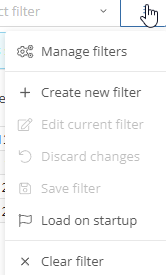
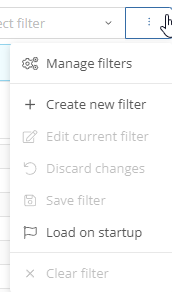
You can set and manage the filter via  .
.
Vehicle groups:
You can create, add and update groups of vehicles in the vehicle group settings. You can grant approvals for specific areas of the company and thus determine who has access to a specific vehicle group. You can  one and you can use the -button to edit something, or delete something by clicking on . If you want to share the vehicle group click on
  or if you want to refresh you can click on . By clicking on this button
  you can go to your vehicles and their settings . Here you have the option to switch between single and multi mode.
  . You can use the filter function to select which information or parameters you want to see .
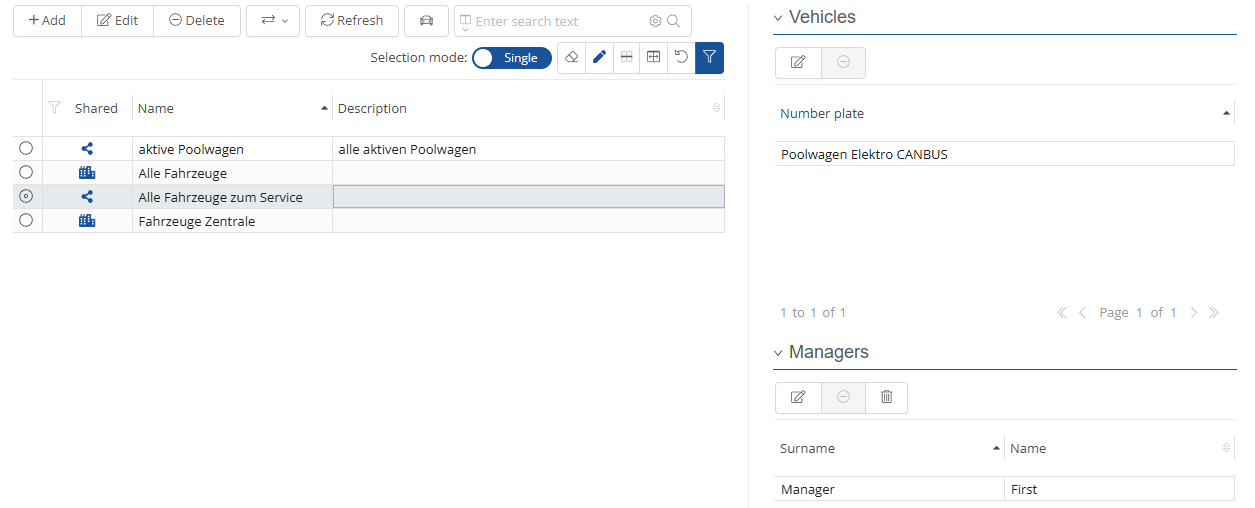
To create a vehicle group, click on the -button. The following window then opens:

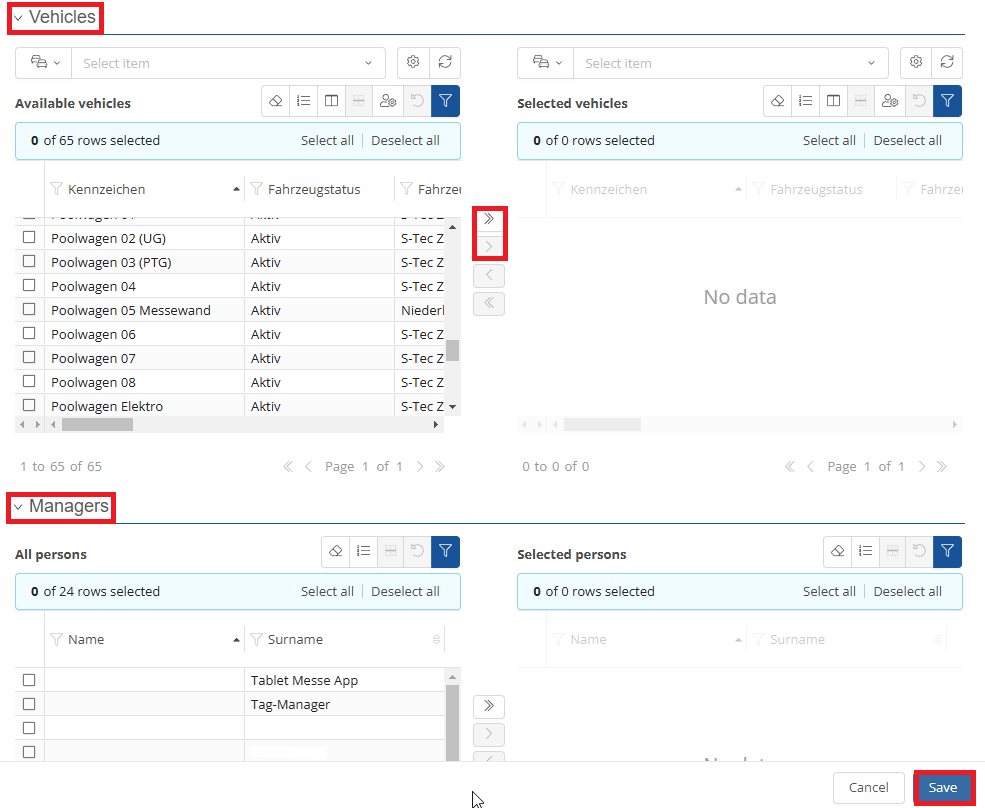
First of all, a vehicle group name must be entered. To release the vehicle group, you must release the group. You can then select the vehicles to be added to the vehicle group. To do this, tick the vehicles and then click on the  -button. Similarly, you can remove vehicles from the list by ticking the vehicle and moving it to the left again.
You must now select an administrator for the vehicle group. This can be several people. The administrator(s) will be able to edit the vehicle group. At the end, all you have to do is save using the -button.
You can edit an existing vehicle group using the -button. A similar screen opens as when adding.
Vehicle import:
Here you can import and save vehicles. If you need help or have any questions, please contact Support.

Vehicle location:
In the vehicle location settings, you have the option of defining and changing the location of a vehicle in the system.
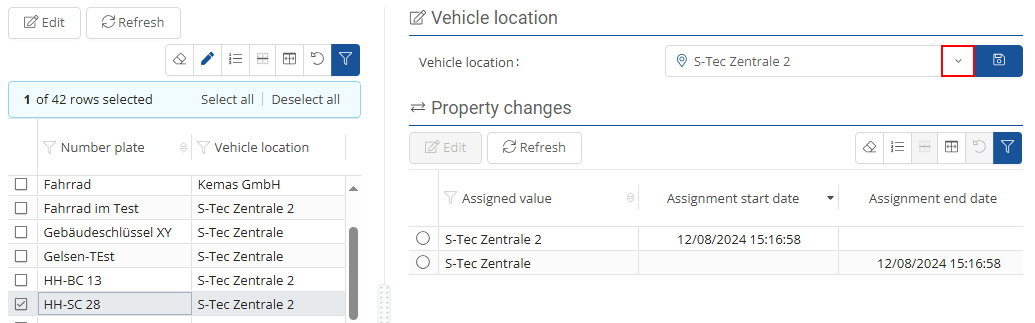
Click on a vehicle to select it. To select multiple vehicles, check the corresponding vehicles in the first column.
You can use the filter function to display vehicles according to the selected filter.
Once you have selected the vehicle(s) for which you want to set or change the location, you can do this on the right-hand side of the screen by clicking on the  -button and selecting the desired location.
The same function is available if you click on the -button.
To save the new setting, click on the  -button.
Vehicle owner:
In the vehicle owner settings, you can add vehicle owners and rename existing ones. You can one and you can use the -button to edit something, or delete something by clicking on . If you want to refresh you can click on . You can use the filter function to select which information or parameters you want to see  .
.

You can create new vehicle owners by clicking on the -button.
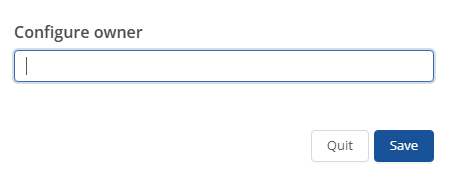
You can save the new vehicle owner by clicking on the -button.
You can use the  -button to edit an existing vehicle owner. A similar screen opens as when adding.
Vehicle property status:
Here you can view and manage the ownership status of your vehicle. You can edit it via and update it via .
The filter function  allows you to select which vehicles are displayed.

If you want to create the filter you can click on  .
.
You can create edit the property status by clicking on -button.
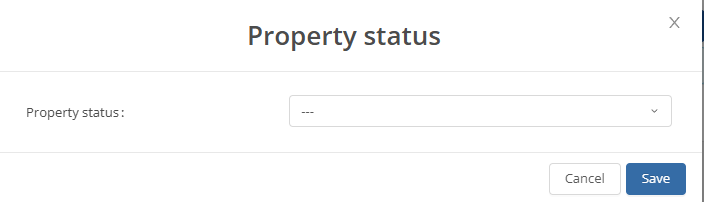
You can save it by clicking on the -button.
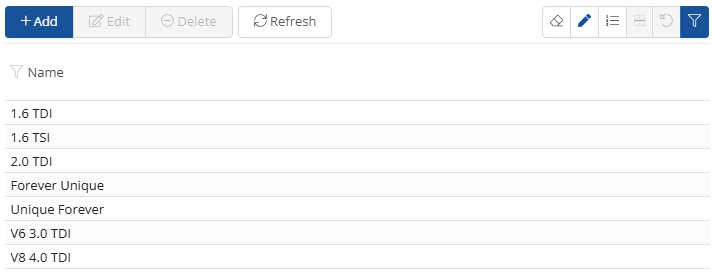
Vehicle specification:
In the vehicle specification settings, you can add specifications for individual vehicles and rename existing ones. You can one and you can use the -button to edit something, or delete something by clicking on . If you want to refresh you can click on . You can use the filter function to select which information or parameters you want to see .
You can create a new vehicle specification by clicking on the -button.
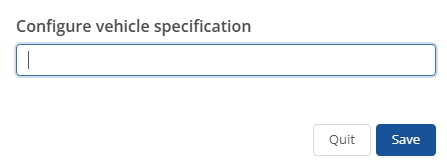
You can save the new vehicle specification by clicking on the -button.
You can use the -button to edit an existing vehicle specification. A screen similar to that for adding opens.
Vehicle type:
In the vehicle type settings, you can add vehicle types and rename existing ones. You can one and you can use the -button to edit something, or delete something by clicking on . If you want to refresh you can click on . You can use the filter function to select which information or parameters you want to see .
You can create a new vehicle type by clicking on the -button.
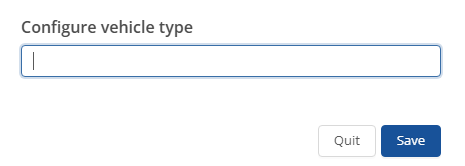
You can save the new vehicle type by clicking on the -button.
You can edit an existing vehicle type using the -button. A screen similar to the one for adding opens.
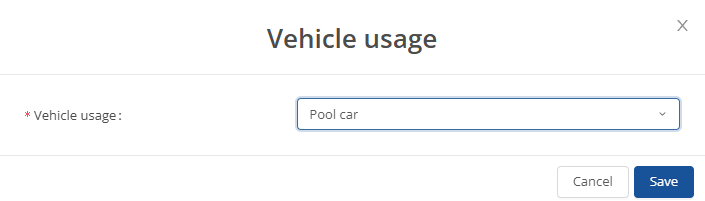
Vehicle usage:
Here you can store and manage vehicle usage. To change or store vehicle usage, click on . To update, click on. You can use the filter function to select which information or parameters you want to see .
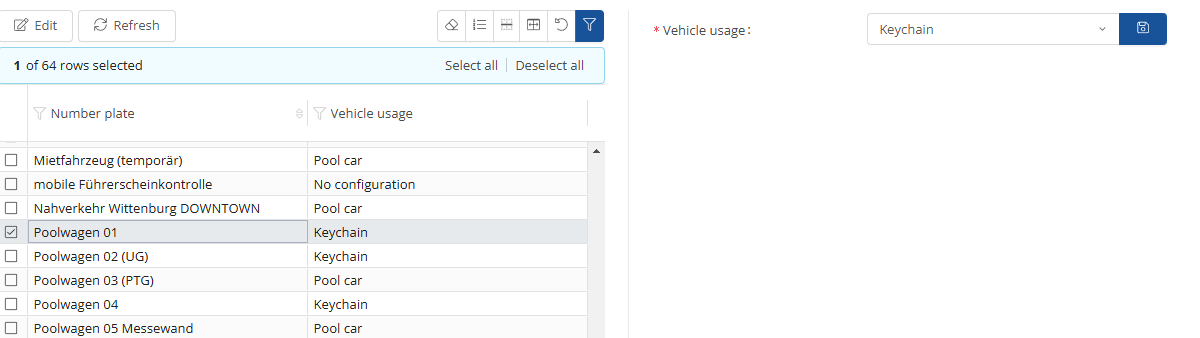
You can use the -button to edit something. You can save it by clicking on the -button.